Article
Articles are generally used for content that is updated more frequently and cross-referenced and categorized (such as news items or announcements). Articles may also be pulled together into an Article Block or Article List Page. The Content admin page will list all the article content on your site.
Demo: Article
Create Article
- Using the admin menu: select Content > Add Content.
- Choose Article.

Enter Title
- Title: the article, announcement or blog post’s title.
Add Article Section
Article sections have three options:
- Article Text - A standard WYSIWYG field with text formatting, and image/media options.
- Slider - A animated image slider with several display options.
- Image Gallery - A thumbnail view of images that enlarge when clicked.
An article can have multiple sections and you can reorder the sections after they have been created.
A simple article or announcement may only contain a single article text section. Multiple sections, or using the different types is not required.
Add Article Text
To add the article text section, click the Add Article Text Button
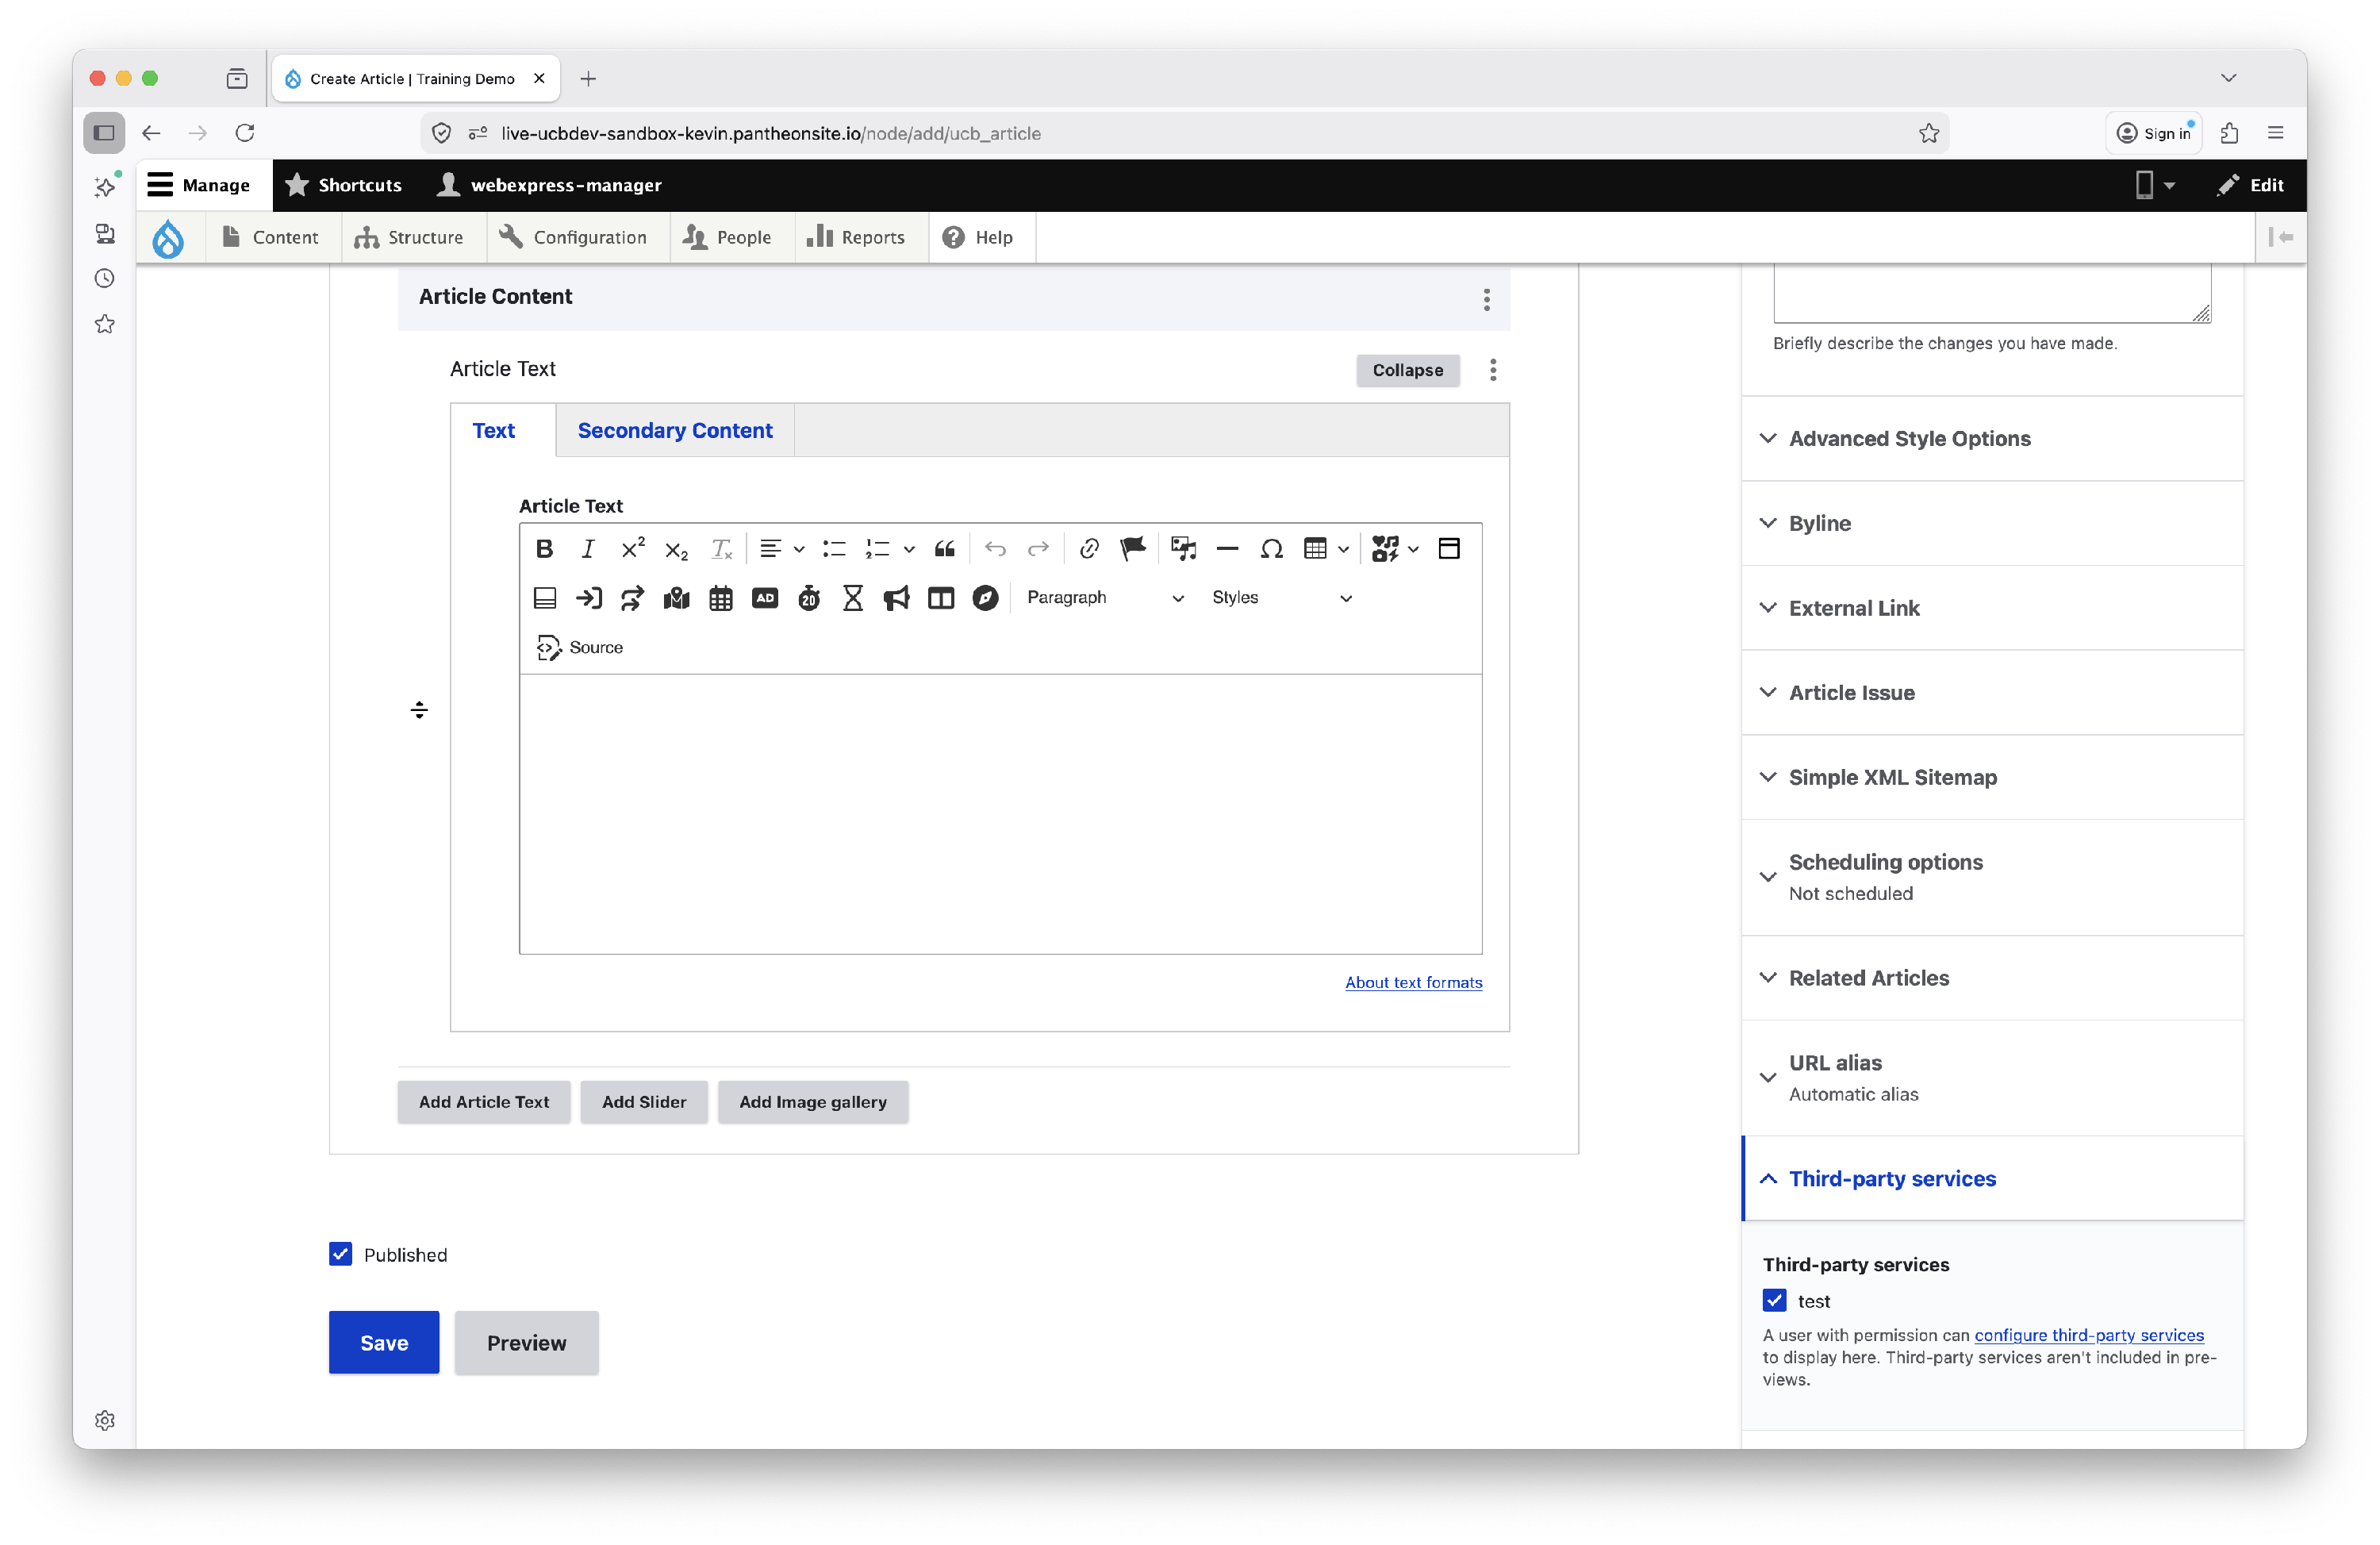
Secondary Content: you can add media (image/video), a blockquote, or additional text to the section. The secondary content is only available in Article Text sections.

- Media: Click Add Media
- Click Add Media again to go to the media library where you you may add a new file or select content in the media library.
- Click Insert Selected.
- Article Media Location: Options for media placement. Top/Bottom is good for wide images while Left/Right are good for tall images.
- Blockquote: Click Add Blockquote
- Article Blockquote Text:
- Article Blockquote Icon:
- none
- quote
- exclamation mark
- question mark
- lightbulb
- person
- Secondary Text: Click Add Secondary Text
- Add additional text content
- Content can be styled using the WYSIWYG tools, including boxes, buttons, media, icons, etc.
- Reusable Secondary Text: Click Add Reusable Secondary Text
- Reusable Secondary Text must be created before they can be added
- You can create these in the Paragraphs Library under the Content menu
- Article Secondary Content Location:
- Choose where the secondary content will appear relative to the main content. Options include top, bottom, right, and left.
Add Slider
To add the article slider, click the Add Slider button
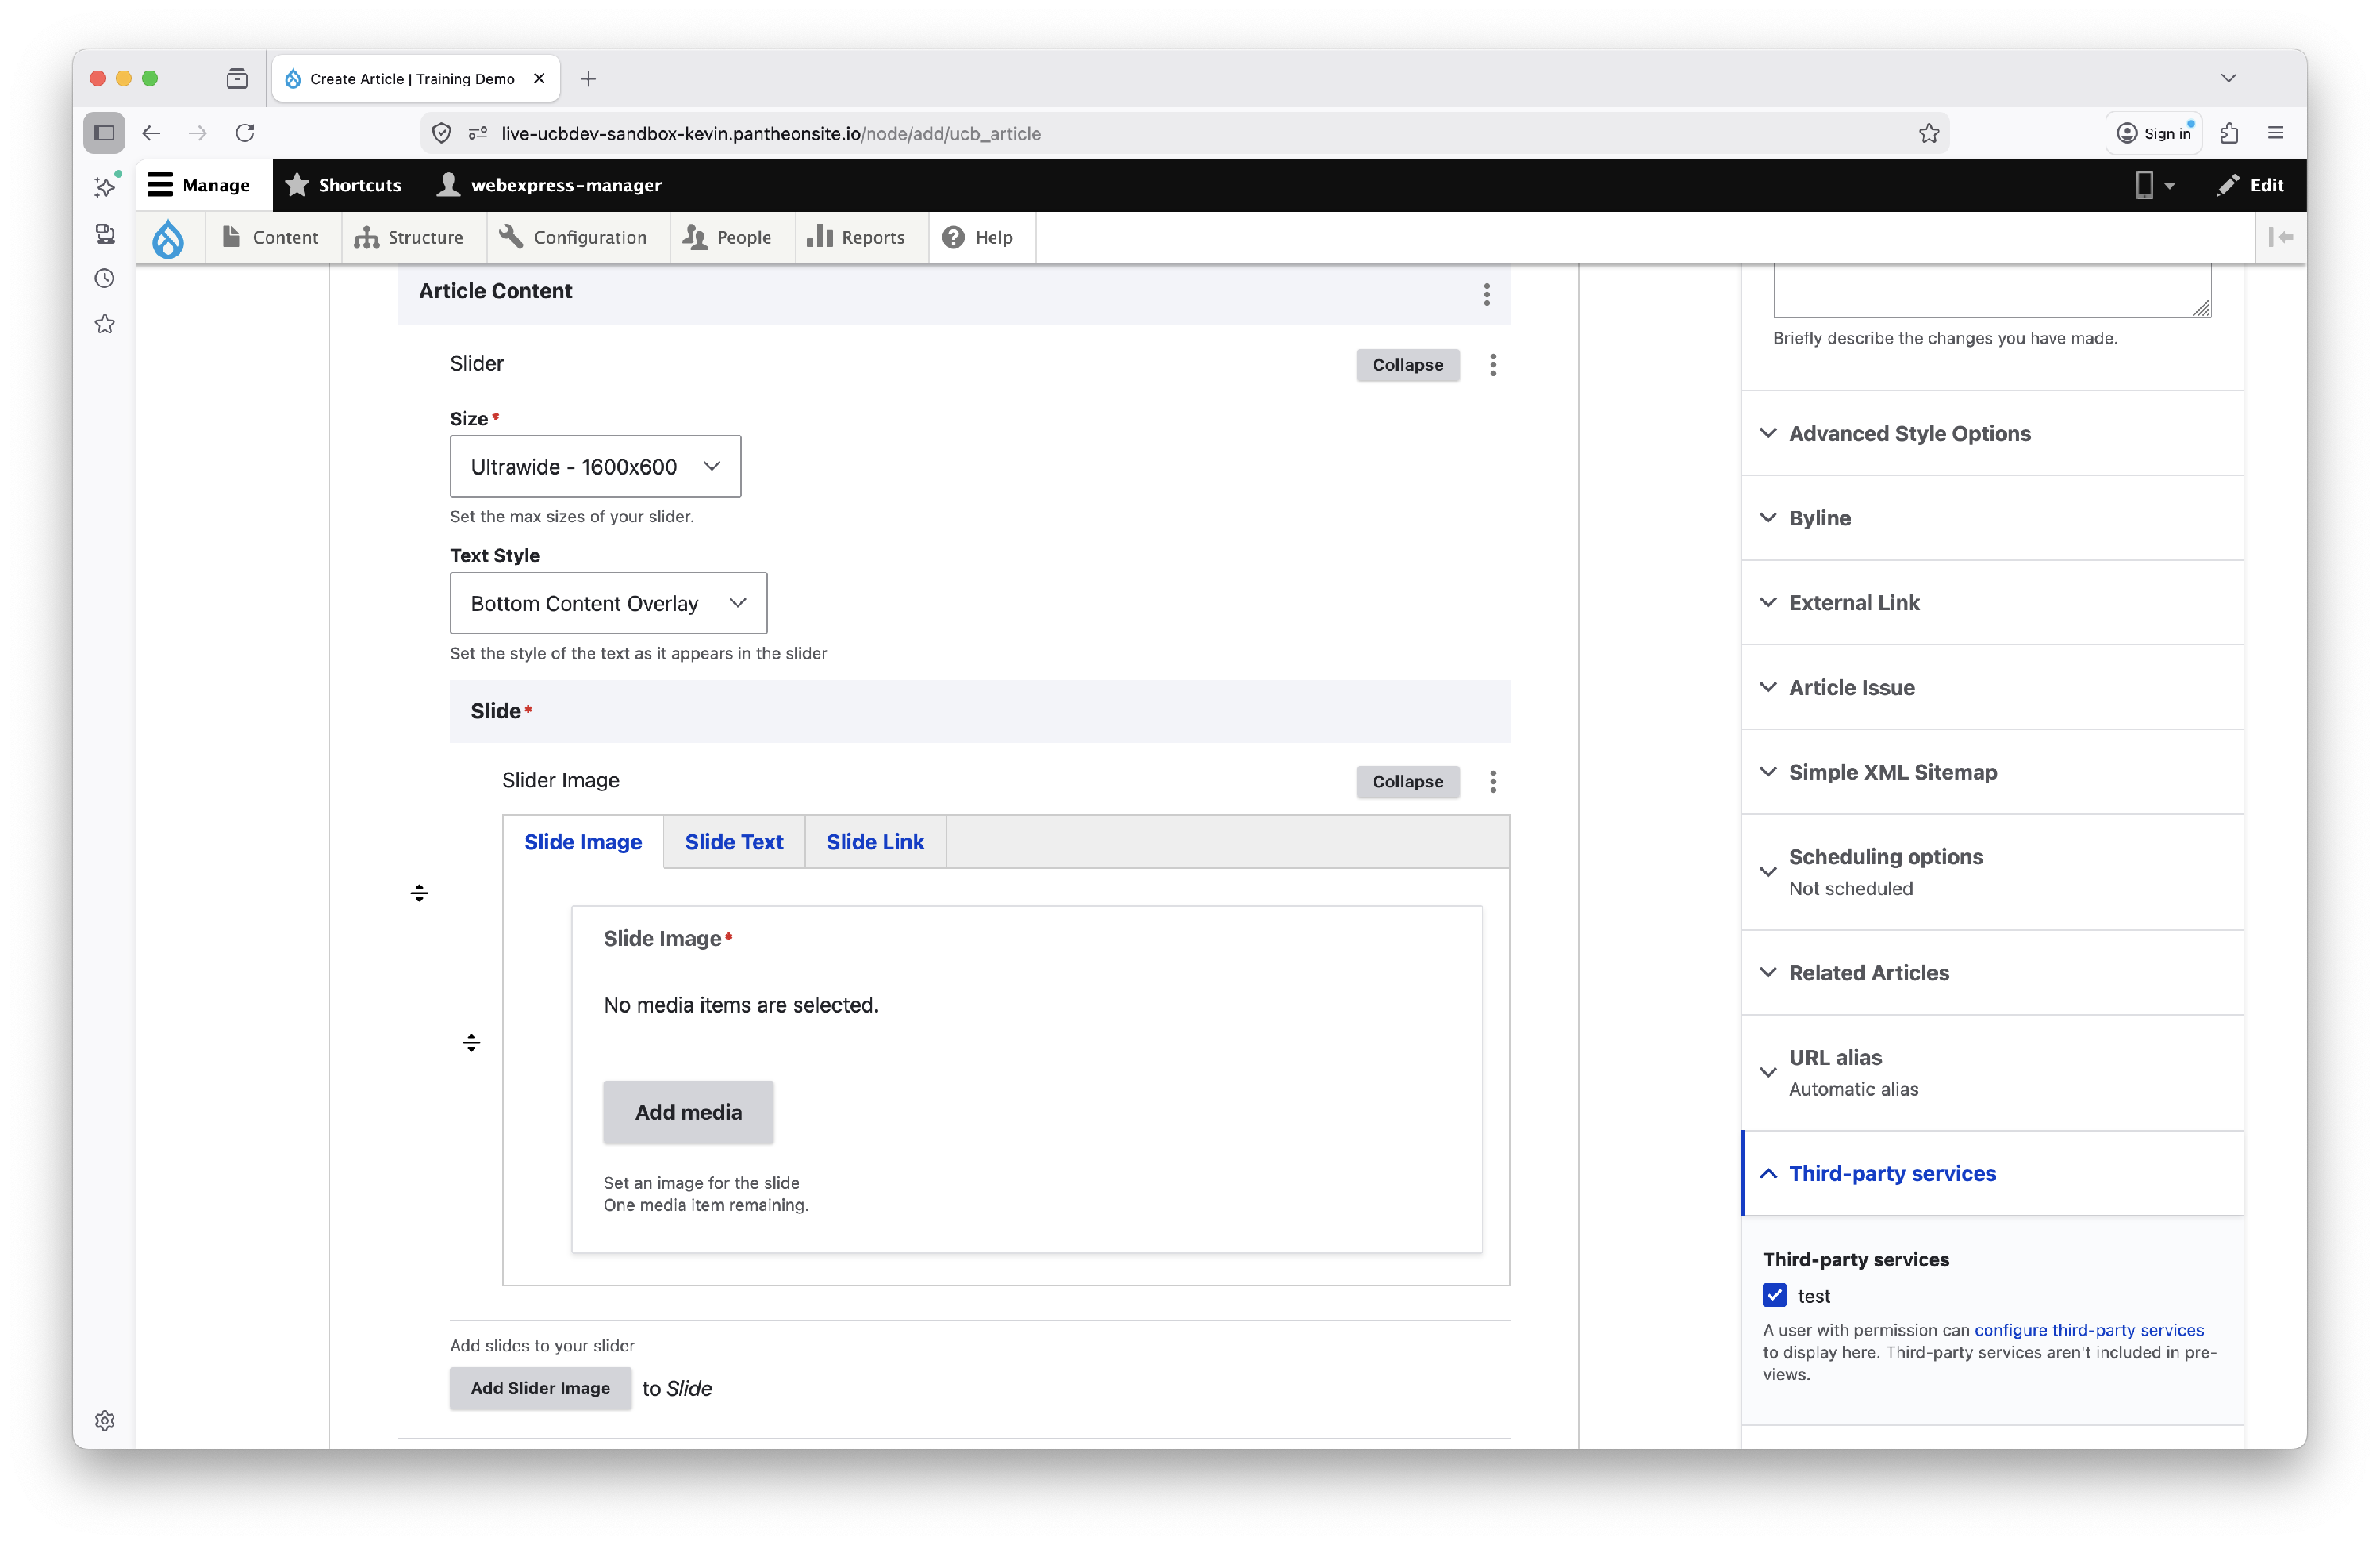
Learn more about how creating a slider - the configuration options are the same as the slider block.
Add Image Gallery
To add an image gallery, click the Add Image Gallery button.
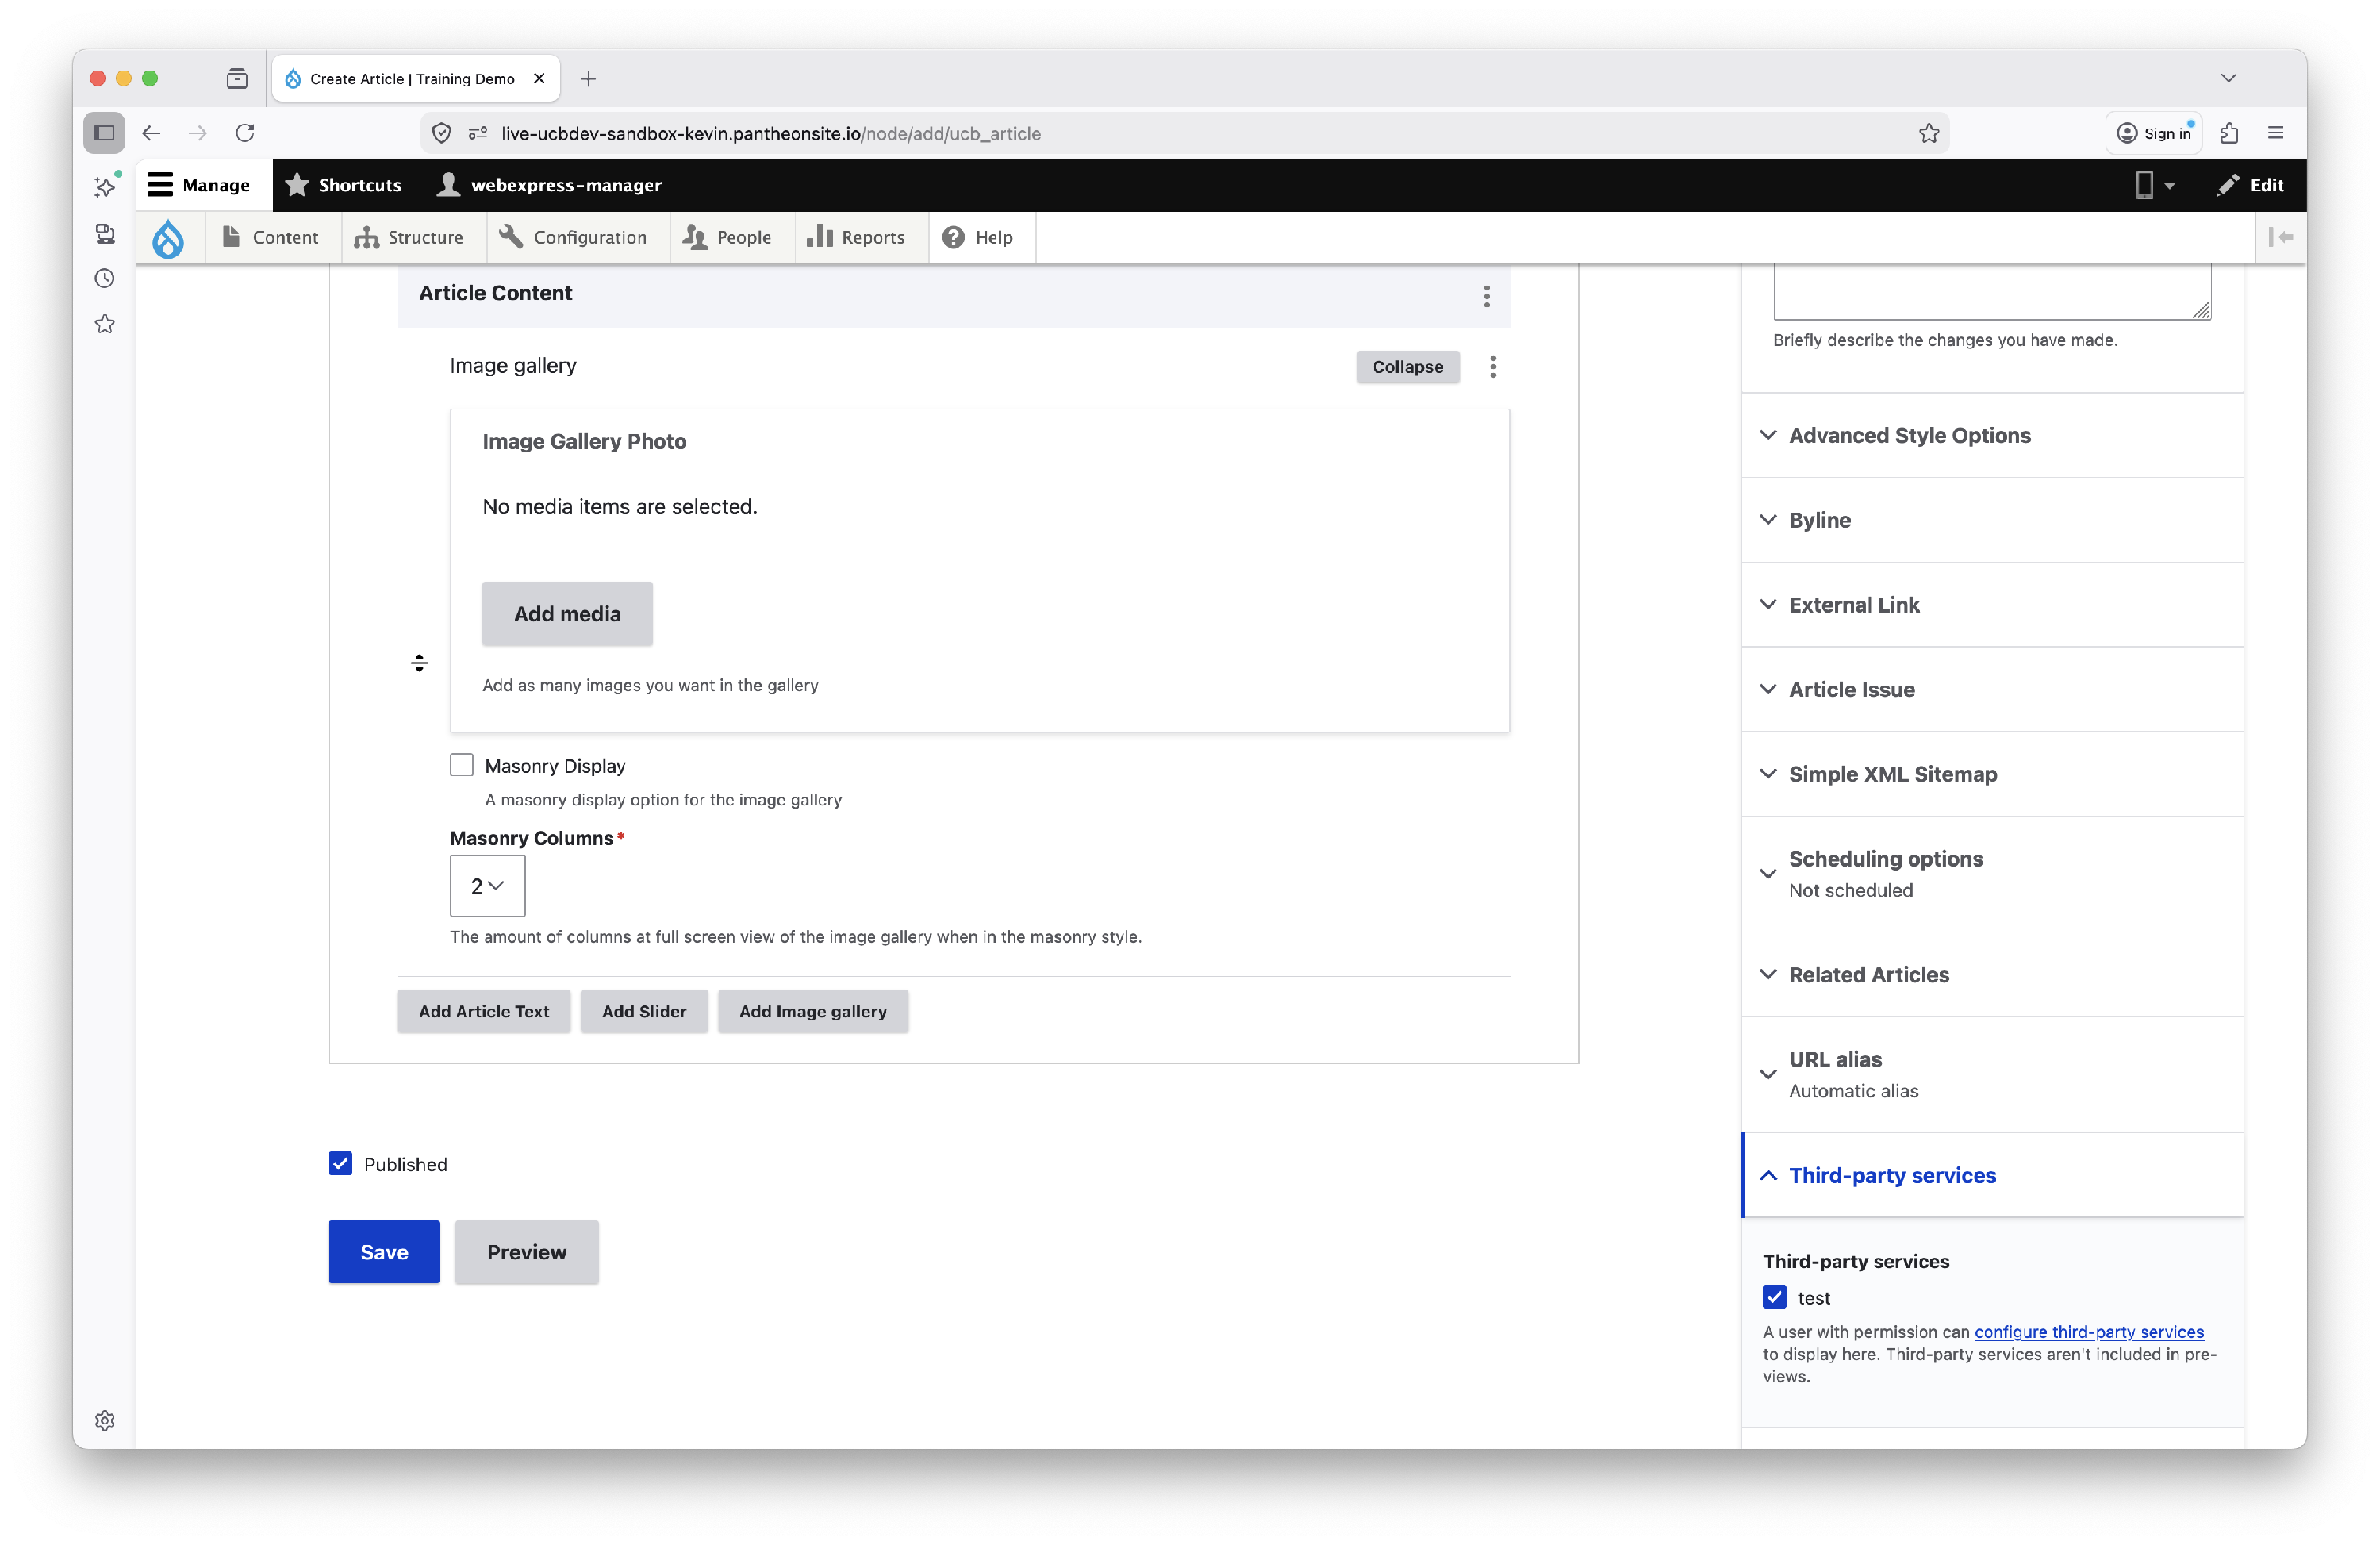
Add images to the gallery by clicking the Add media button. You can choose images from your site's media library, or upload new images.
Display Options
- Thumbnail Grid
- Masonry Display with column options
Enter Article Summary
Summaries are teasers, or short summaries of the article. They are displayed on the Article List pages, where articles are aggregated. You don’t have to create a summary but it is definitely a best practice; if there is no summary the system will show the first three lines of text of your article, which in some cases may be too long for an attractive display.
- Click Summary tab and enter a short summary of the article.
- Thumbnail: Click Add Media to go to the media library where you you may add a new file or select content in the media library.

Article Categories
Categories are used to group articles into sets of content. You can think of categories as a way to create magazine style article issues.
- Click on the Categories tab.
- In the Categories field, enter a comma-separated list of words to describe your content. Categories are general topics for broad grouping of articles.

Note: As you begin typing a category, the field will auto-populate if the category already exists.
Article Tags
Tags are used to categorize and cross-reference content. You may use the tag to create a page of same-tagged articles, such as 'news', 'announcements' or 'current'.
- Click on the Tags tab.
- In the Tags field, enter a comma-separated list of words to describe your content. Tags describe the specific details of your article.
Note: As you begin typing a tag, the field will auto-populate if the tag already exists.
Article Byline
An article byline will allow you to display by whom the article is written.
- Click on the Byline tab.
- Enter the author's name in the Byline field.

External Link
You may add a URL to articles that are on another site. Visitors who try to view this article will be automatically redirected.
- Click on the External Link tab.
- Enter the URL in the External URL field.

Related: See the Include External Articles in News Feed tutorial for more information.
Link to Issue
Add a link to Issues that the article appears in
- Click on the Link to Issue tab.
- Enter the name of the issue the article appears in. As you begin typing, the field will auto-populate if the issue already exists. Select the Issue name from the list.

Related: See the Create an Issue tutorial for more information.
Advanced Style Options
-
Click on the Advanced Style Options tab.
Article Title Background: This replaces the default title with a full image and a title overlay.
One media item remaining.
- Click Add Media to go to the media library where you you may add a new file or select content in the media library.
- Article Header Overlay: Add an Image overlay to improve readability of your header. Toggle on or off
- Article Header Text Color: Set the Header Image's text color to black or white.
- Header Image Optional Text: Adds an optional line of text beneath the Article date and byline. Useful for adding supplemental Article Header Image information such as an attribution.
Configuration Sidebar: Page Style
- Expand the Page Style section.
- Page style: Select from the list of options.
- Traditional
- Dark Mode
- Zebra Striped
- Date/Time Formatting: Allows for this Article to override the site-wide Date/Time formatting. Leave as None to use site-wide default setting. Site-wide Date/Time format is set in Configuration > CU Boulder site settings. See steps below.

Configuration Sidebar: Scheduling Options
- Expand the Scheduling Options section.
- Publish On: Enter a date and time. Leave the date blank for no scheduled publishing.
Configuration Sidebar: Related Articles
- Expand the Related Articles section.
- Toggle Related Articles on to enable a section showing related articles. You can configure your Excluded Categories and Tags In Configuration > CU Boulder site settings >Related Articles. See steps below.
Configuration Sidebar: Authoring Information
- Expand the Authoring Information section.
- Manually change the Authored On date.
Save
Click Save.
Modify Article Date Display
You may configure the display settings for date formats on all articles on your site.
- Using the Configuration Menu dropdown, select CU Boulder site settings.
- Select Appearance from the list of options.
- Scroll down to the page to Content Types.
- In the Article section, use the dropdown to select one of the following options.
- Short Date, Medium Date, Long date, Short Date with Time, Medium Date with Time, Long date with Time, None
Enable Related Articles
- Using the Configuration Menu dropdown, select CU Boulder site settings.
- Select Appearance from the list of options.
- Scroll down to the page to Content Types.
- In the Article section, toggle Enable related articles by default for new articles to use this feature. You also have the option to exclude categories or tags from this feature.