Form Conditional Actions

You may create branching forms or skip logic with webforms in Web Express. Conditional actions provide the form builder with the ability to display particular form elements based on a previous selection by the form user. There are many possible combinations of components and actions that can be utilized.
A few examples are:
- Show and hide components based on "Select options" components that the form user has selected.
- Show and hide all components contained in a fieldset.
- Show and hide webform pages.
- Email submitted form to one email address or another based on form user component choice.
This tutorial shows you the basics but keep in mind that conditions can get extremely complex. The best way to learn about conditional actions is to get in and experiment with the different things you can use and affect.
Add an Element Condition
Each element can be configured with conditional logic.
- Click on the Conditions tab to start.
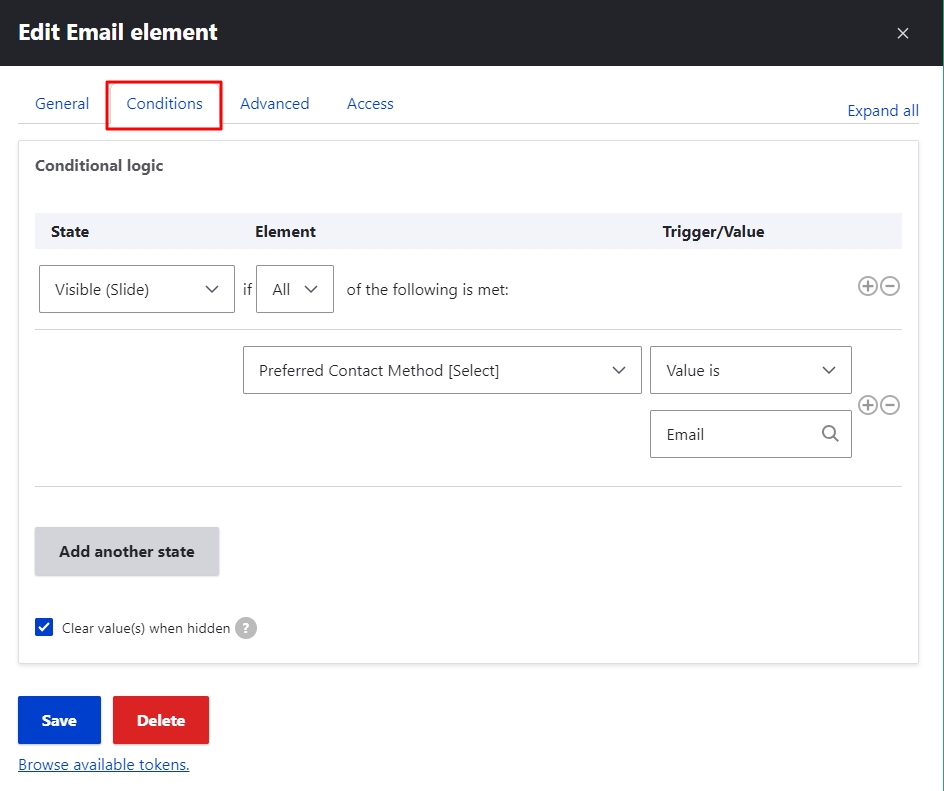
Fill Out the Conditional Logic
- Fill out the Conditional Logic options:
- State:
- Click on the State dropdown. Select the state you would like the element to have when the form is first visited.
- Visibility: visible / hidden
- State: enabled / disabled
- Validation: required /optional
- Value: Checked/ unchecked
- Click the conditional logic (all, any, or one) to be met.
- Click on the State dropdown. Select the state you would like the element to have when the form is first visited.
- Element: Select an element for the condition to impact
- Trigger Value: Select the element
- Click the plus sign to and another conditional element /trigger pair
- State:
- Add another State
- Clear value(s) when hidden: Leave enabled (default)
- Click Save.
- Click Save elements on form.